
最近发布的极摩客 G3 Plus 迷你主机备受关注。其独特之处在于搭载升级版的英特尔 Twin Lake 平台 N150 处理器,起价仅569元(准系统),在同类小型主机中性能价格比最为突出。
这款主机具有广泛的用途,可用于 All In One、PVE、ESXi、Unraid、NAS、软路由、Windows 11、Ubuntu 等多种应用场景。

极摩客 G3 PLUS 迷你主机亮点概述:
●处理器性能:搭载英特尔 N150 处理器,4核心 4线程,Intel 7 工艺,最大睿频达 3.6GHz,24EU 核显频率高达 1000MHz。
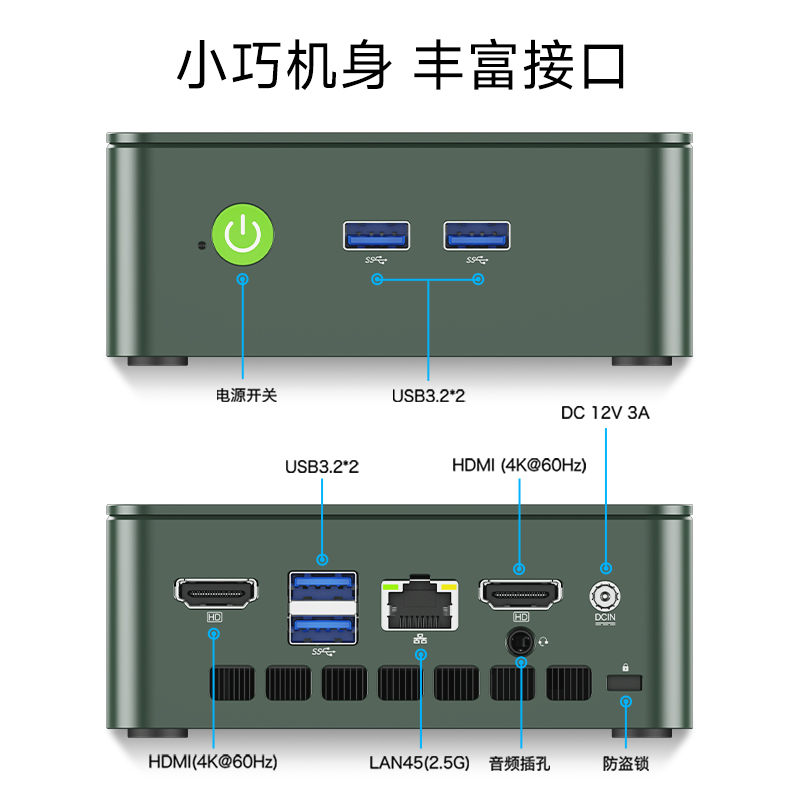
●精致外观:尺寸为114mm×106mm×42.5mm,提供雅丹黑和雅丹绿双色可选,外观时尚。
●存储扩展:硬盘最大可扩展至4TB(M.2 2280 PCIe),支持内存单通道最高达16GB DDR4 3200MHz。
●丰富接口:前置双 USB 3.2 接口与电源开关;后置双 HDMI(4K 60Hz)、双 USB 3.2、3.5mm 音频接口、DC 电源接口以及一个2.5G 网口。

详细参数:
●内存:DDR4 3200 MT/s 单通道内存。
●硬盘:M.2 2280 NVMe(PCIe3.0),最大可扩展至4TB;另一 M.2 2242 可扩展至2TB。
●显示输出:双 HDMI 输出,最大支持4096x2160分辨率。
●网络连接:Realtek 8852BE + 英特尔 i226-V 网卡,支持 Wi-Fi 6 和蓝牙 5.2。

这些特性使极摩客 G3 PLUS 迷你主机成为一款性价比强、外观精致且功能丰富的选择,适合广泛的用户需求。
性能跑分:

总体而言,极摩客 G3 Plus 是首批搭载 N150 处理器的入门级迷你主机,性能优于同价位的 N100 小主机。其简化设计支持无需工具开盖升级,569元的准系统价格表现出极大诚意。外观设计分为两种风格,满足不同用户审美需求,N150处理的出现将结束N100的时代,新一代省电节能家用小型主机。
进入正题,PVE安装openwrt做无线软路由教程
第一部分、安装OPENWRT
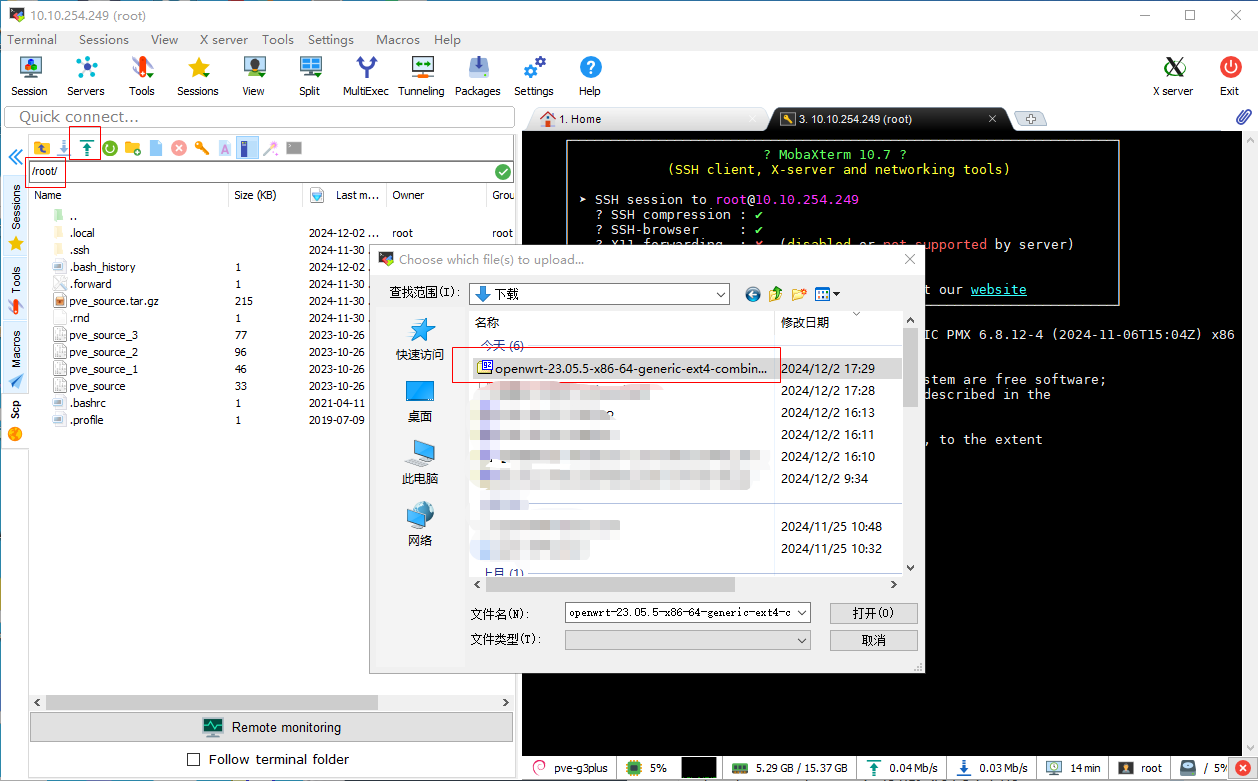
上传openwrt-23.05.5-x86-64-generic-ext4-combined-efi.img.gz到PVE的ROOT目录下
输入
apt install gzip #安装gzip工具
gzip -d openwrt-23.05.5-x86-64-generic-ext4-combined-efi.img.gz #解压
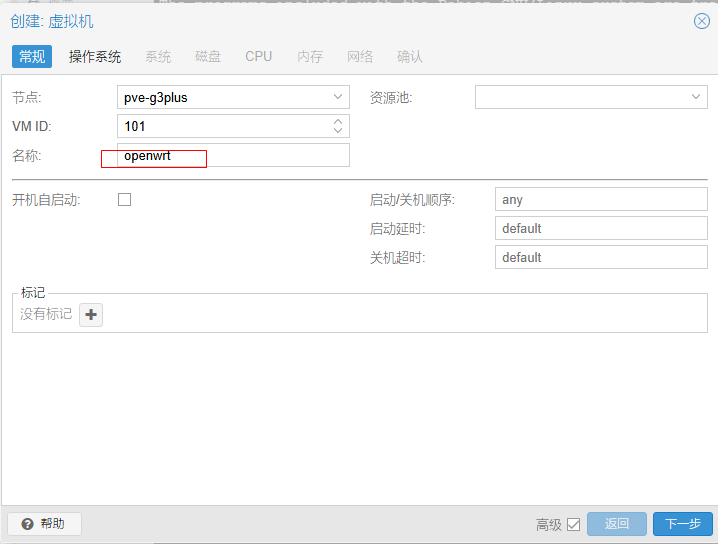
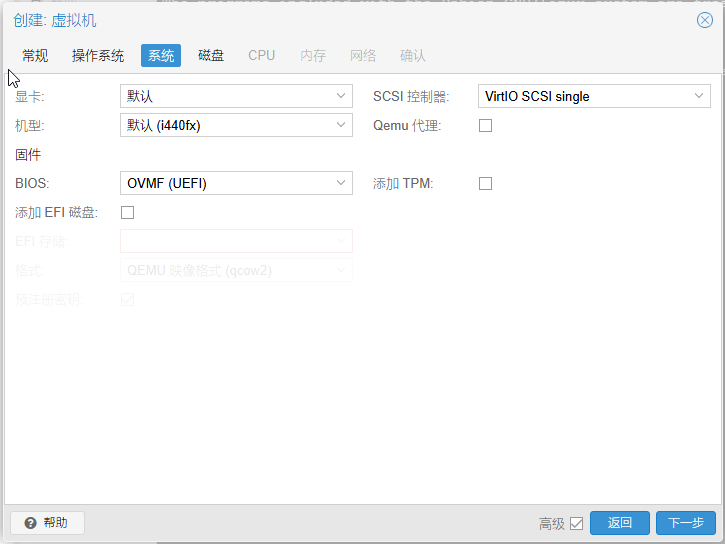
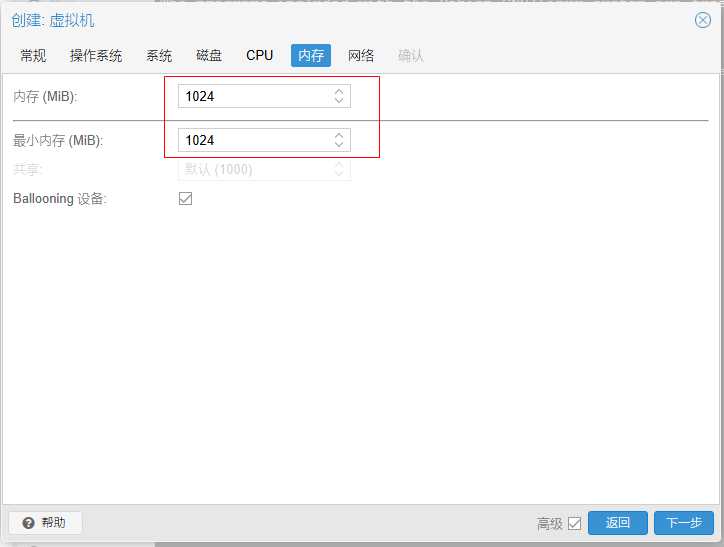
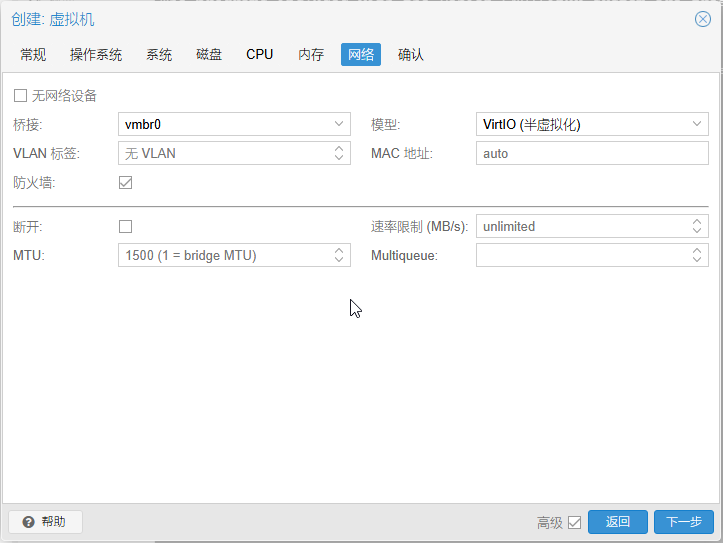
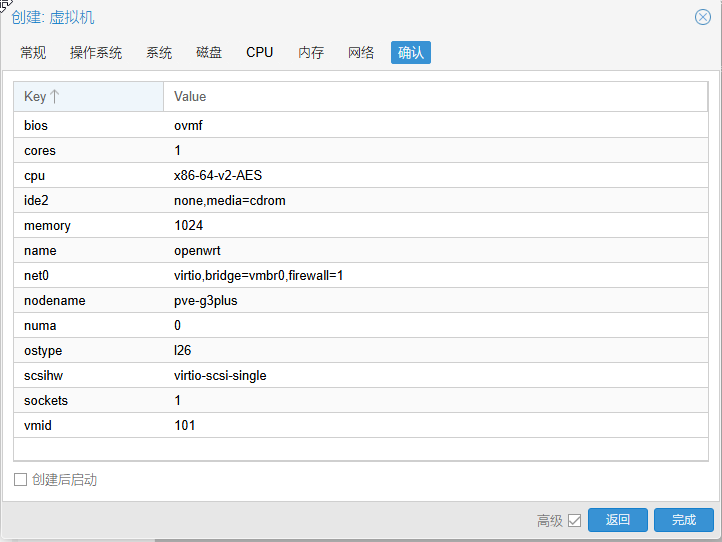
创建软路由虚拟机
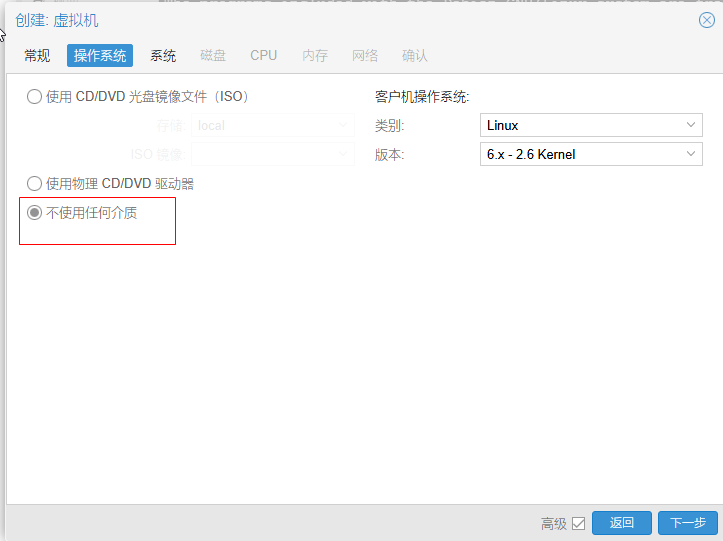
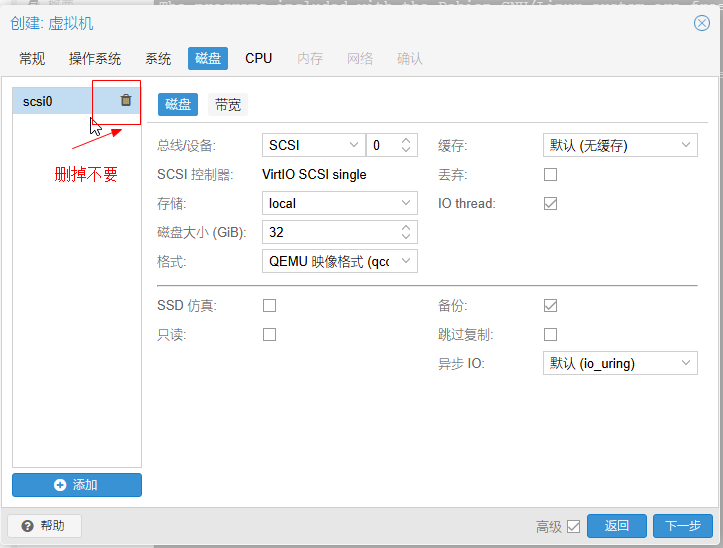
移除光驱
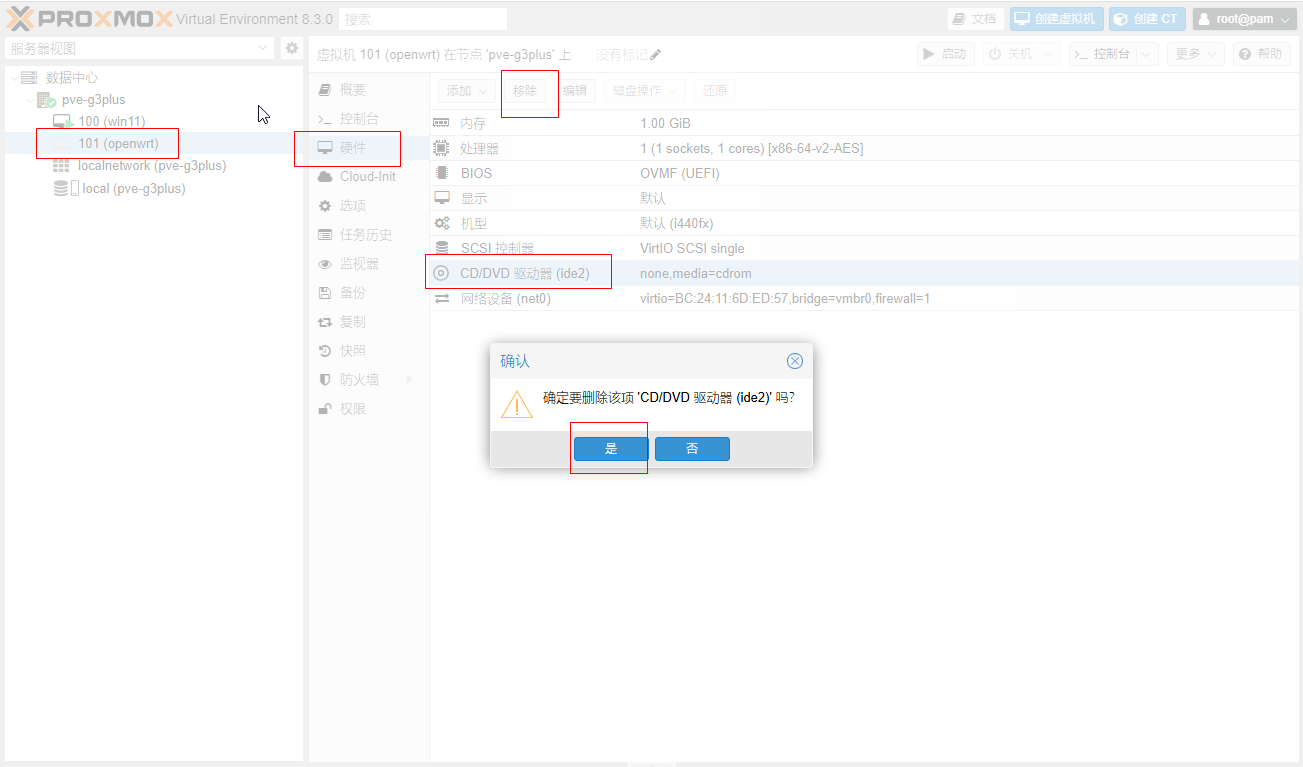
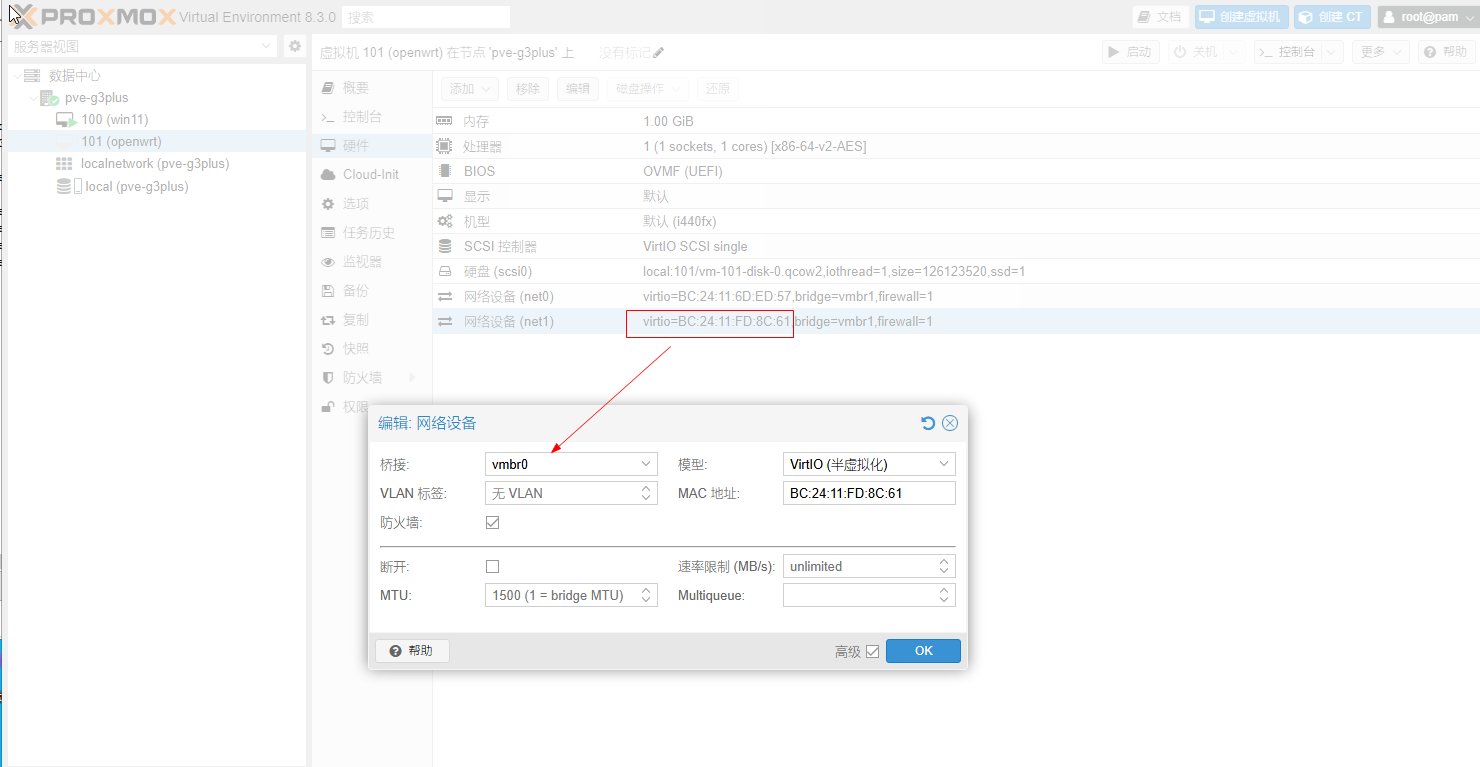
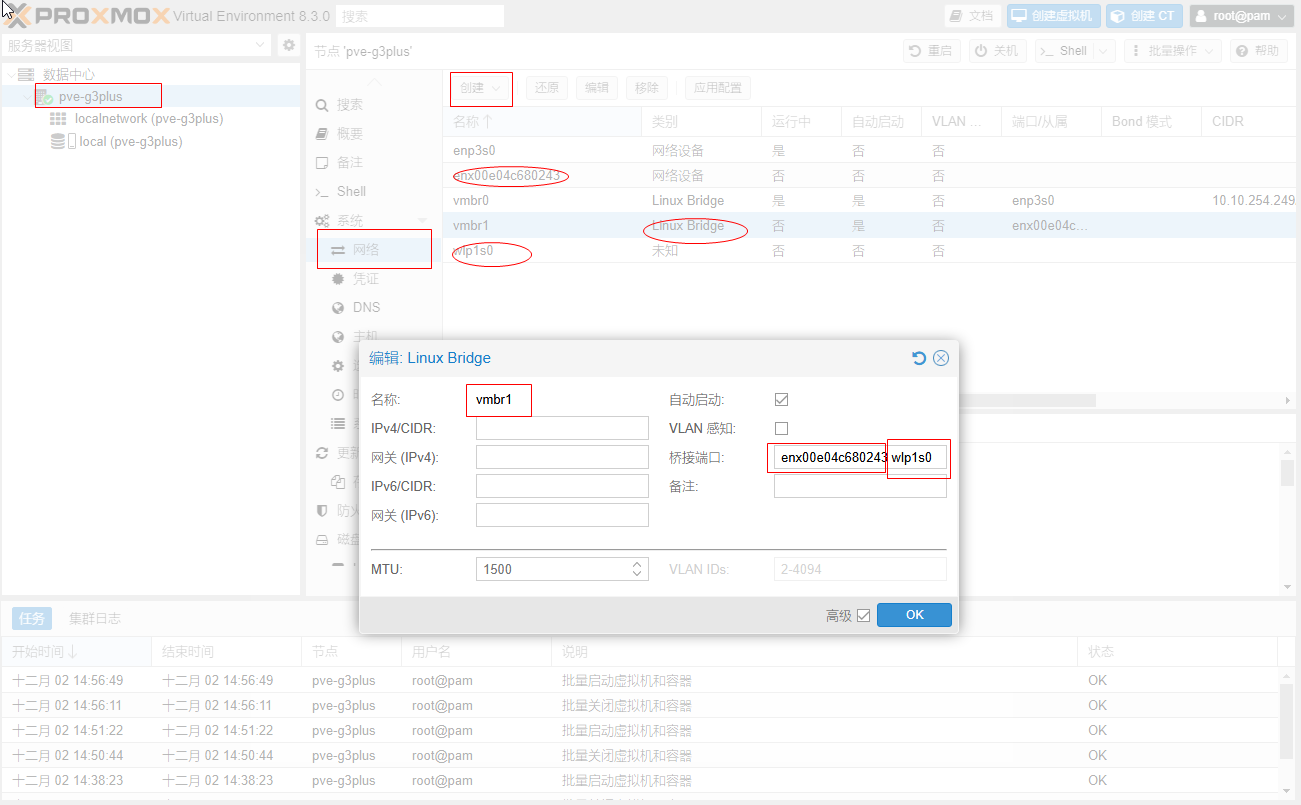
添加网桥vmbr1,做LAN口业务

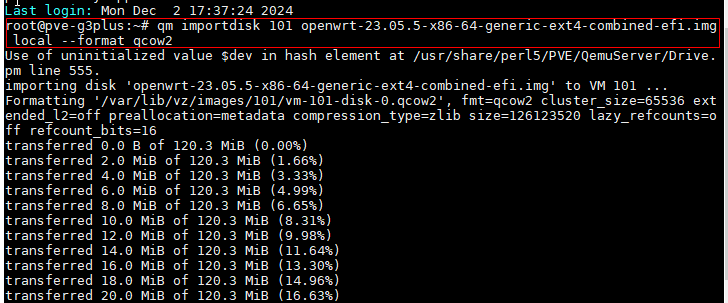
接下来,将openwrt-23.05.5-x86-64-generic-ext4-combined-efi.img挂盘
输入:
qm importdisk 101 openwrt-23.05.5-x86-64-generic-ext4-combined-efi.img local --format qcow2
其中101就是PVE虚拟机的ID号
然后,添加硬盘
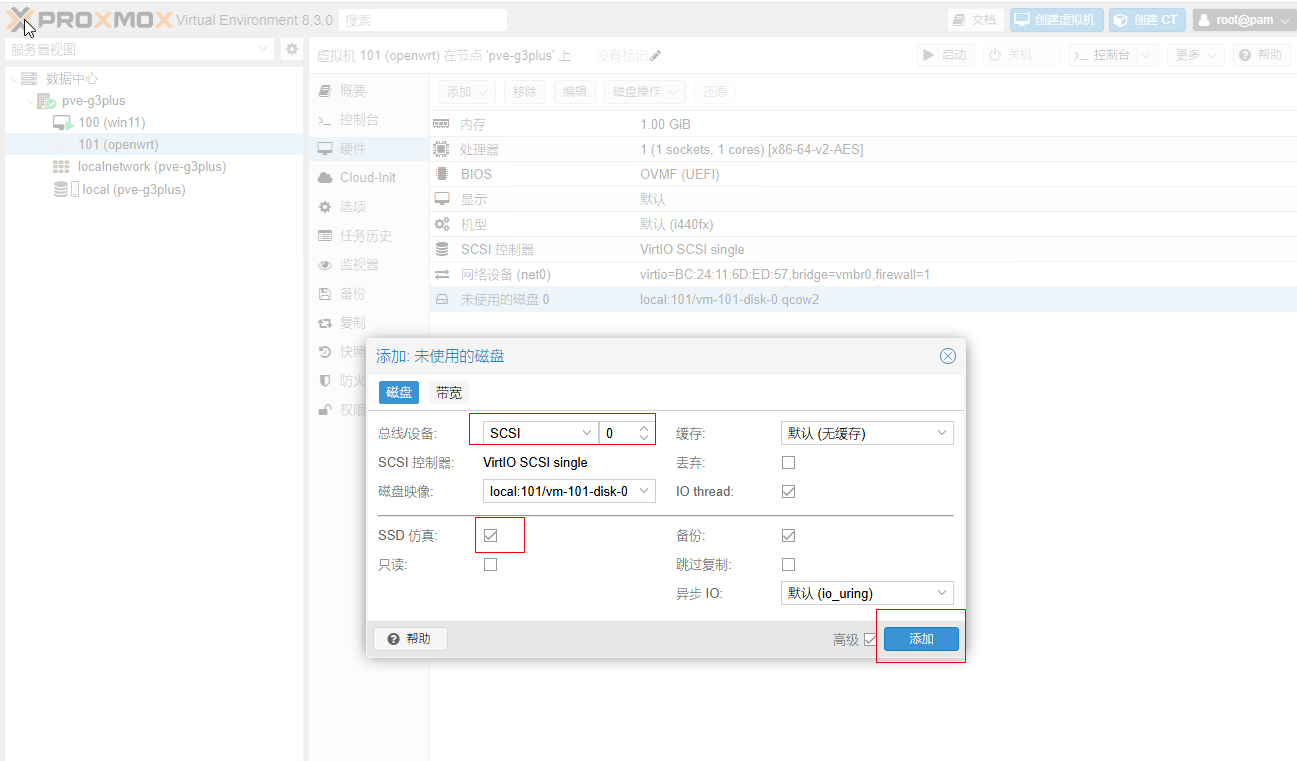
设置硬盘为第一启动项目

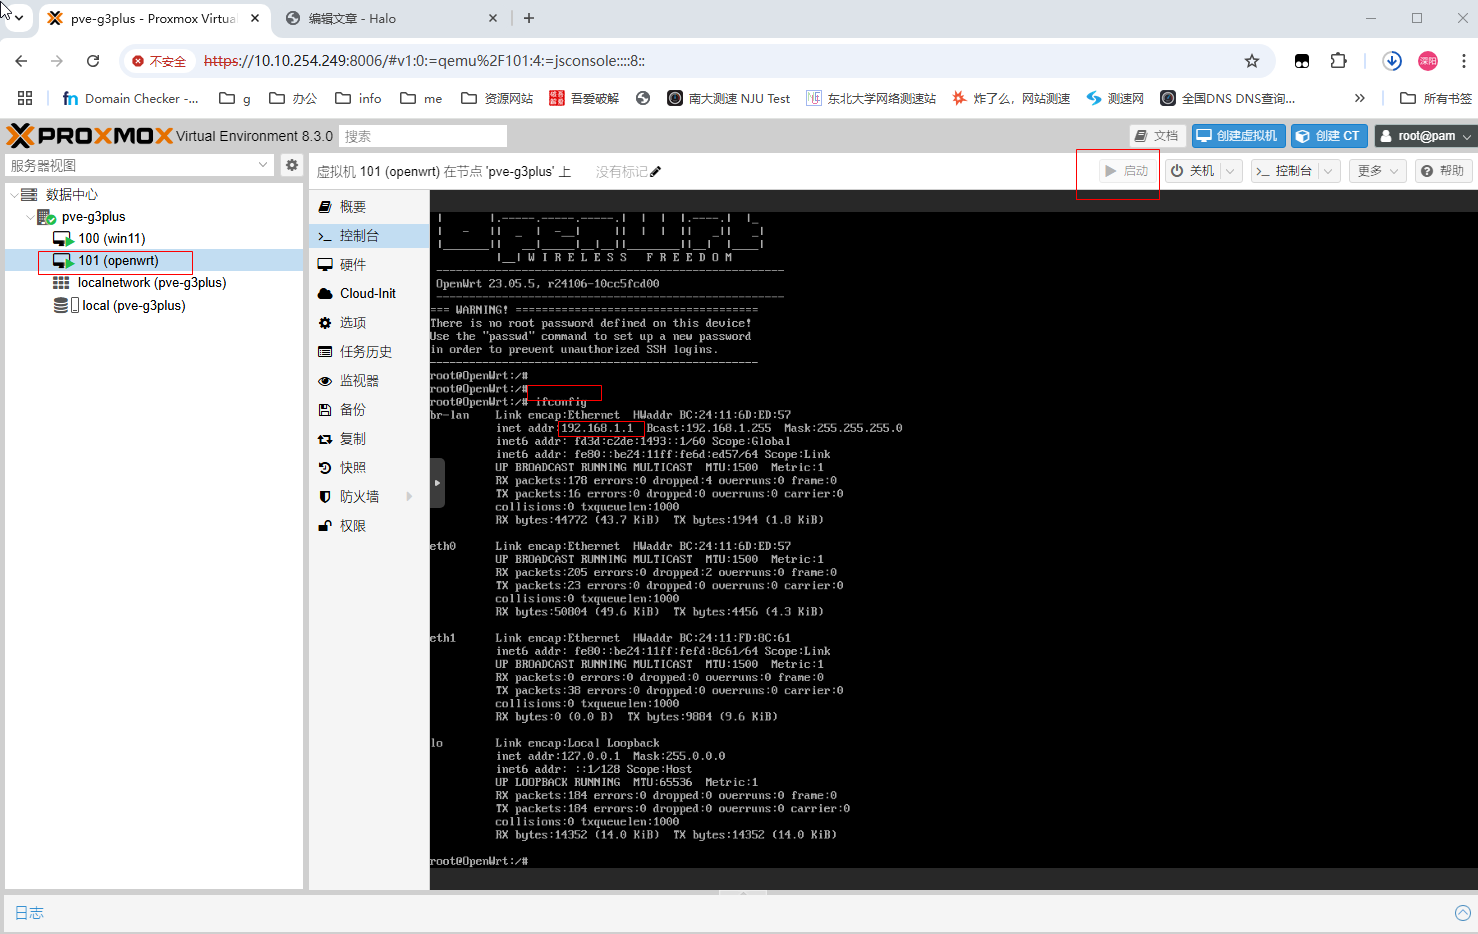
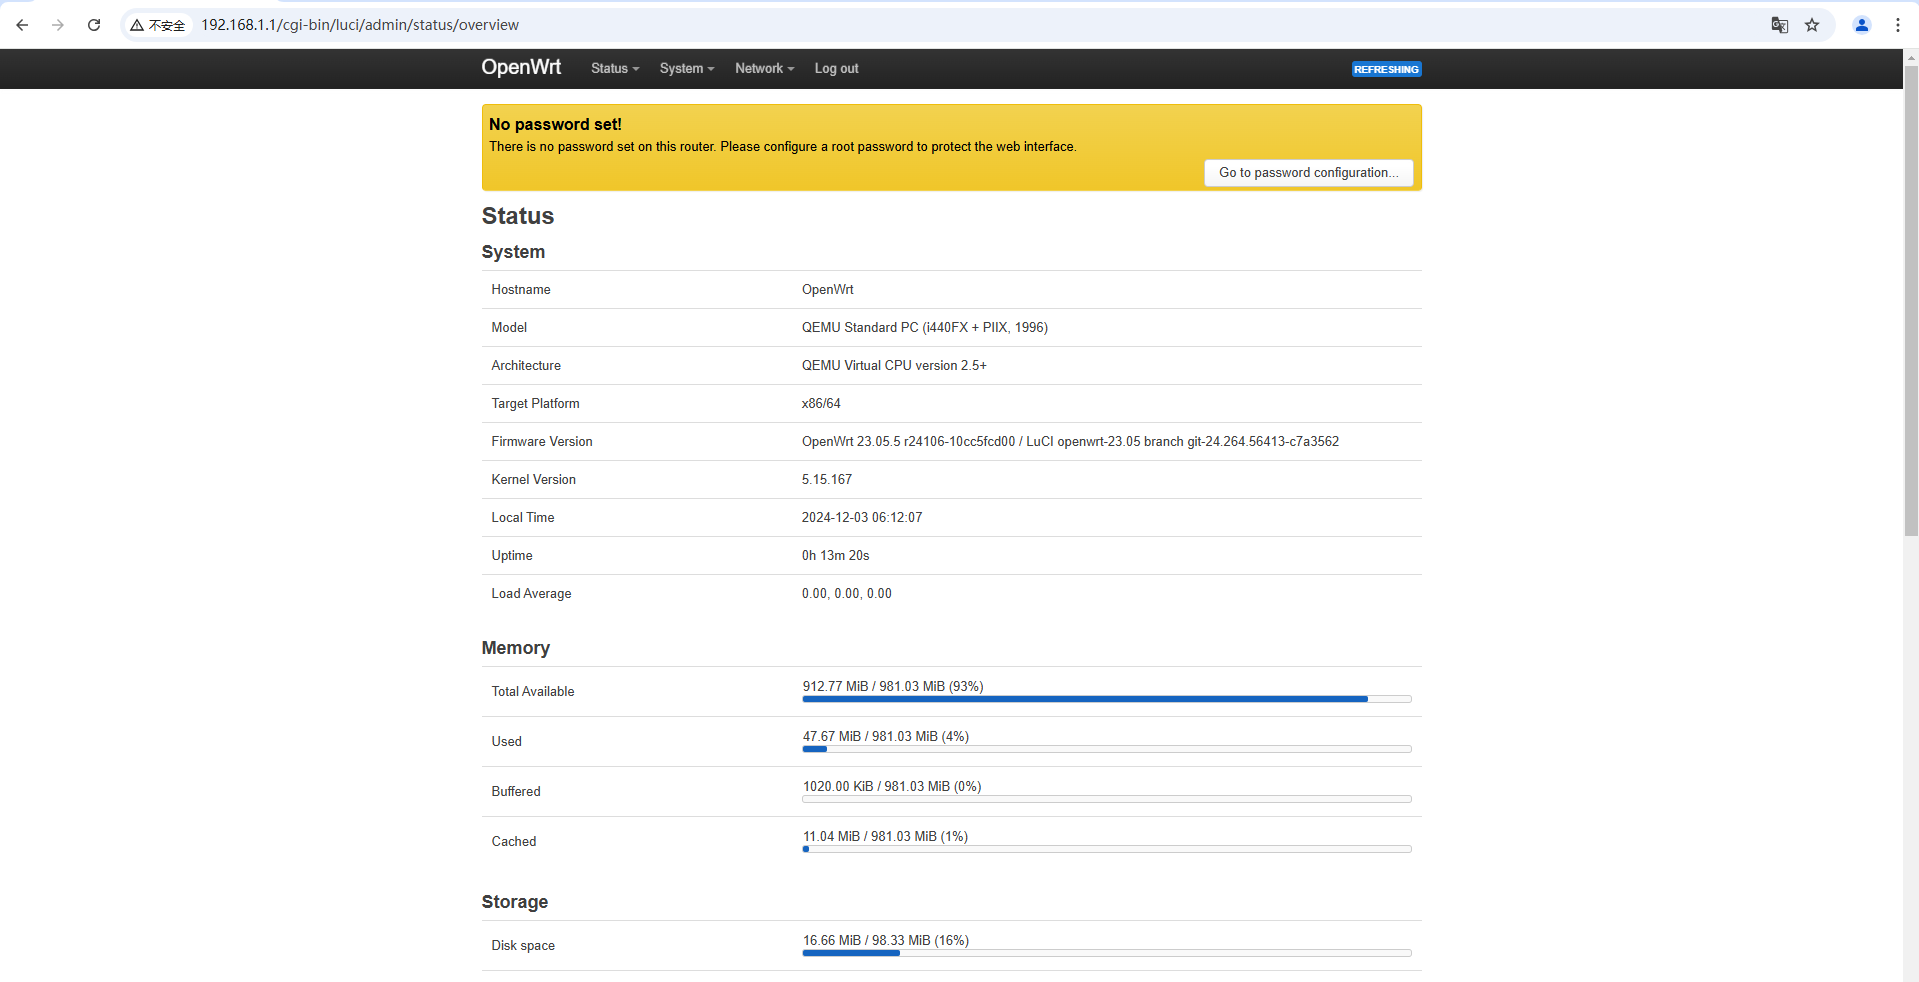
开机,输入Ifconfig,看到默认管理地址是192.168.1.1
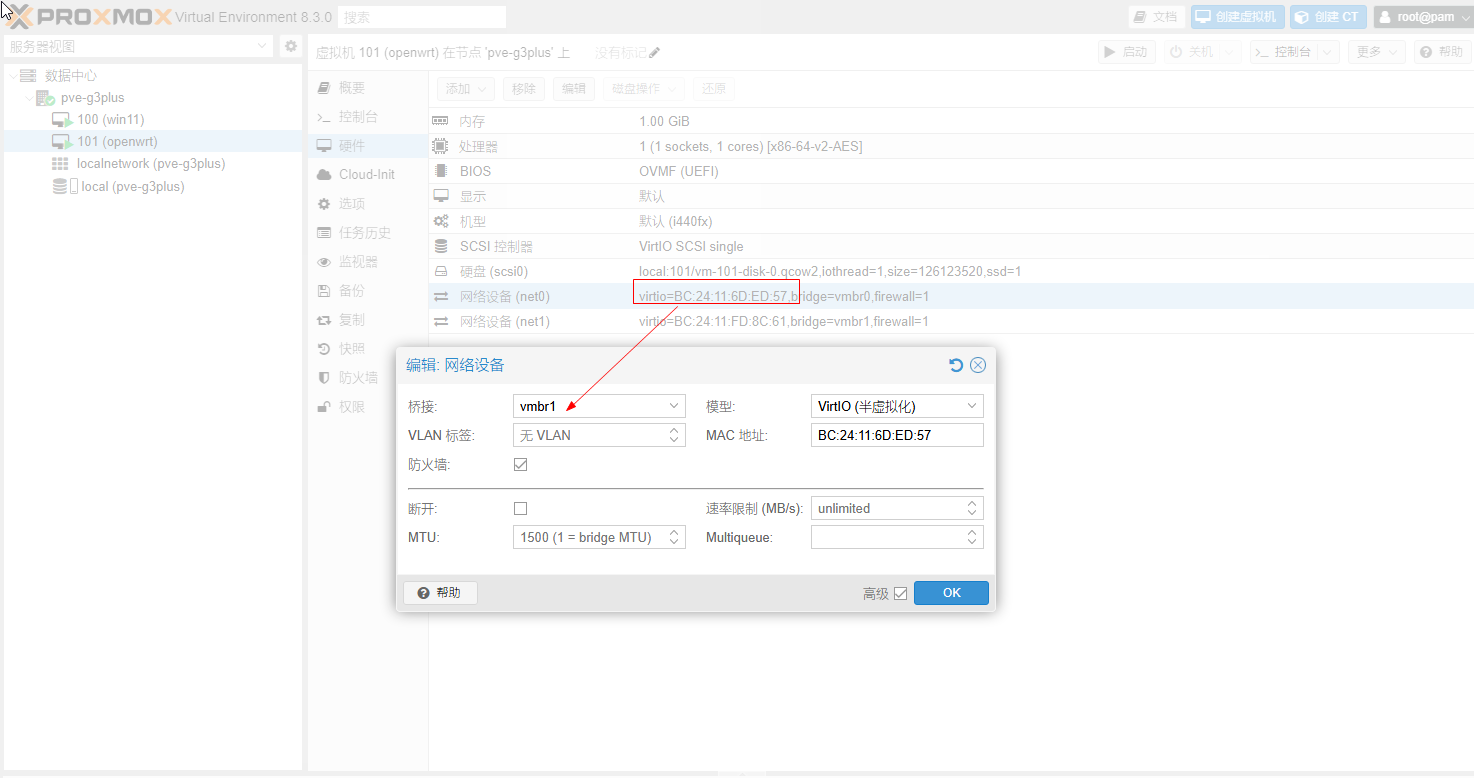
这里发现两个网桥反向了,软路由关机对调下。
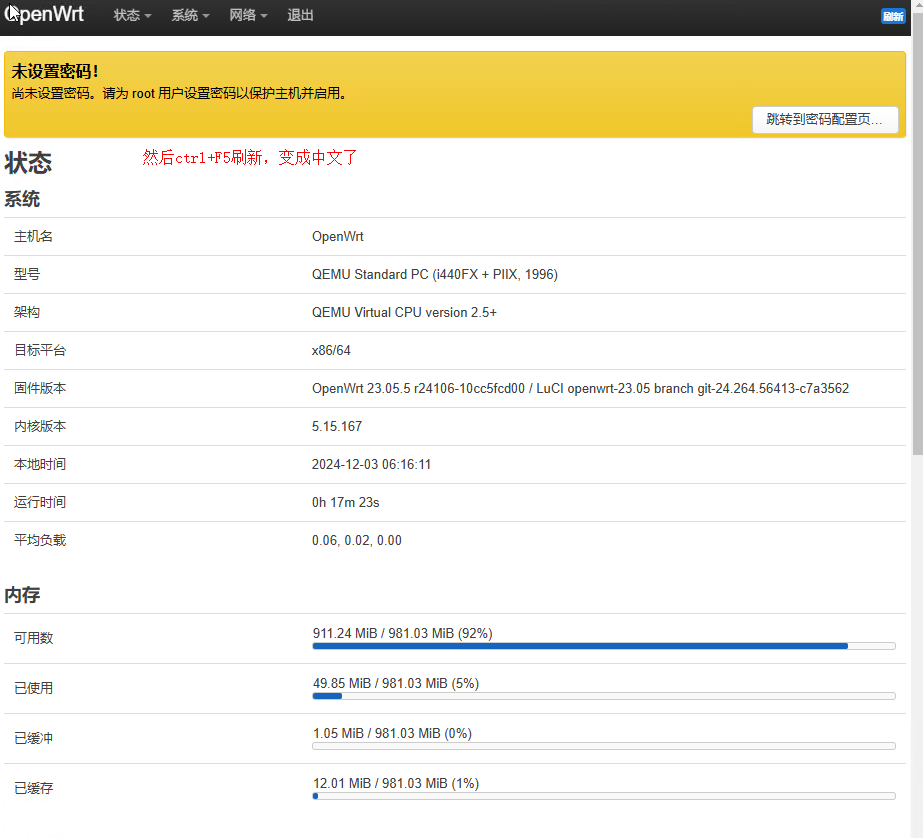
然后软路由开机,游览器输入IP访问控制台,用户名root,密码password
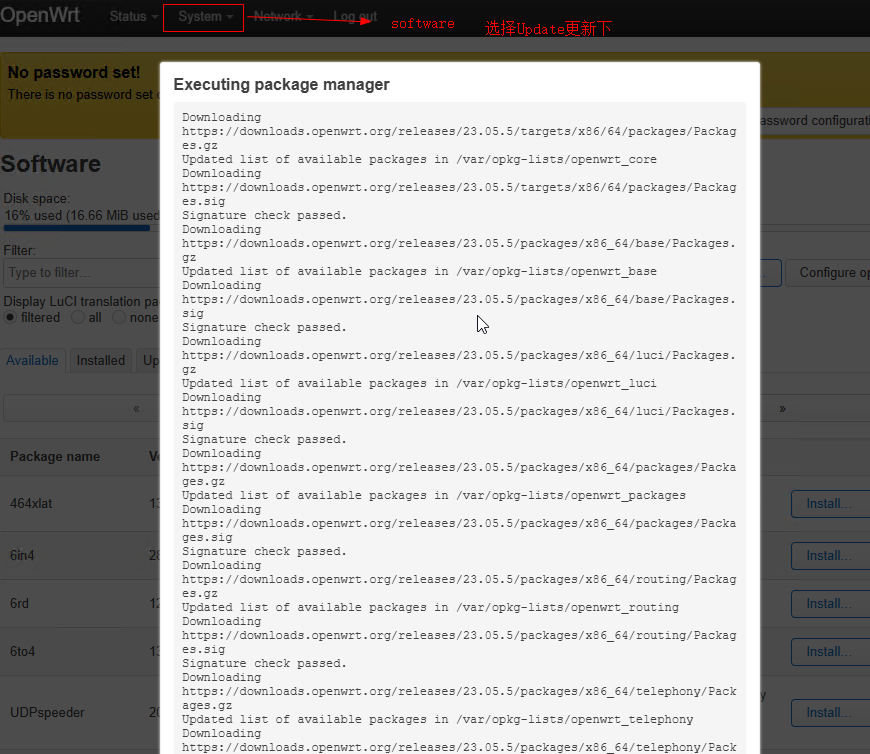
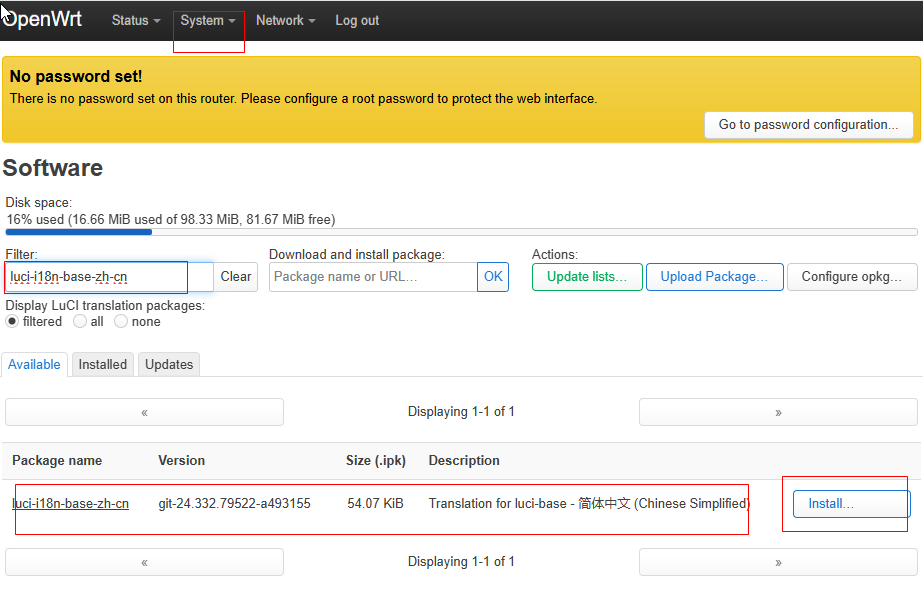
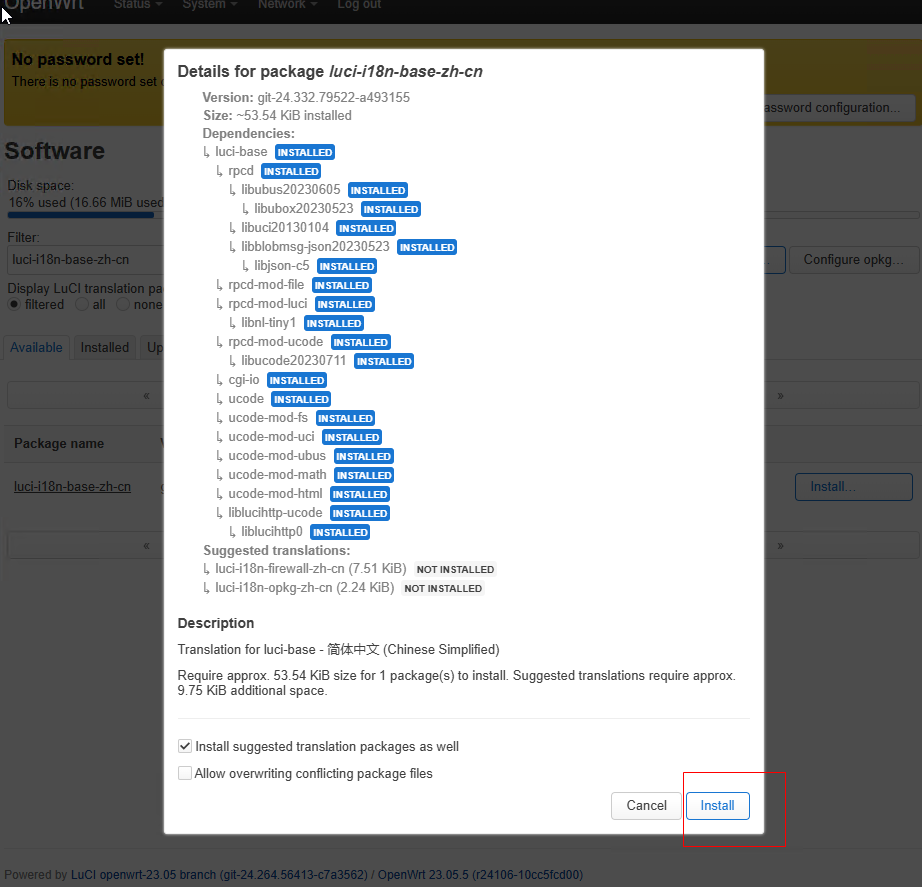
找到system下software点击update lists,然后输入luci-i18n-base-zh-cn安装中文包
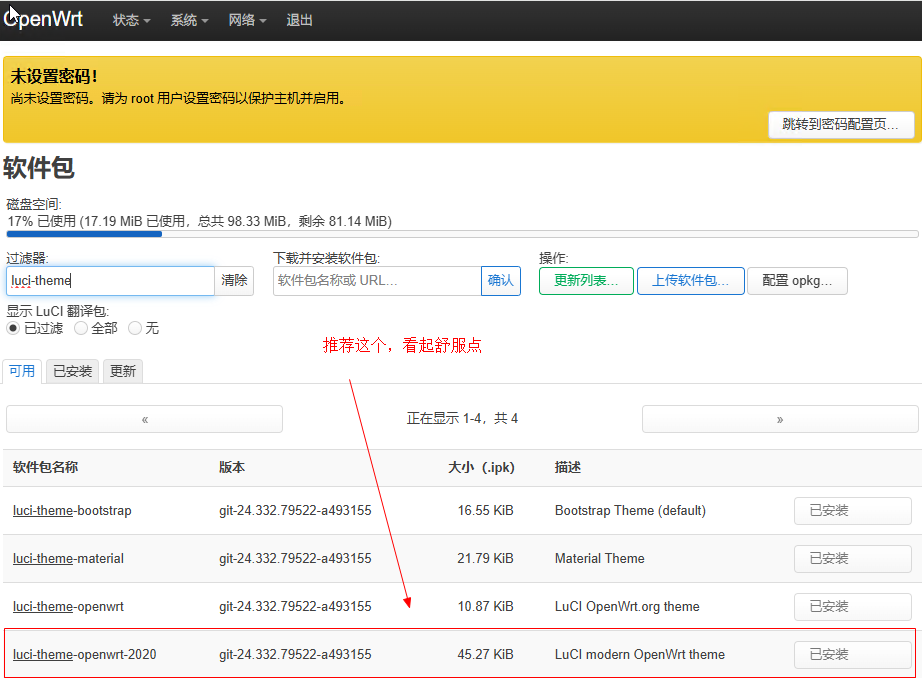
输入luci-theme,这里有4个主题包,按照个人喜好安装下

第二部分、桥接无线热点步骤:
1、创建vmbr1网桥,绑定外加USB网卡和无线网卡
2、#启动无线网卡
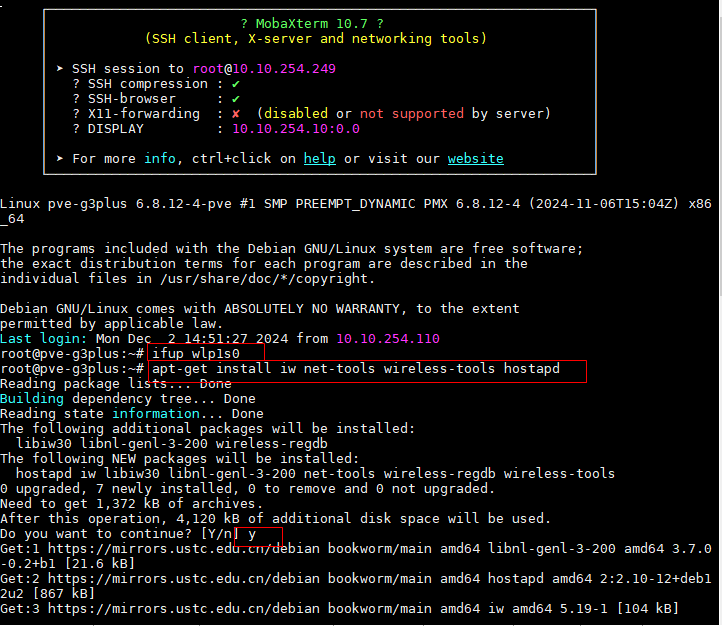
ifup wlp1s0 #wlp1s0 改为你的实际网卡名称
3、#安装工具无线相关工具,以下命令已经全部打包
apt-get install iw net-tools wireless-tools hostapd
Y
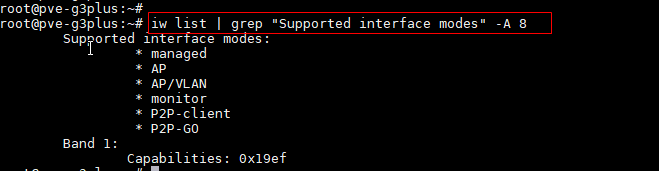
4、查看是否支持无线AP模式,可以看AP AP/VLAN
iw list | grep “Supported interface modes” -A 8
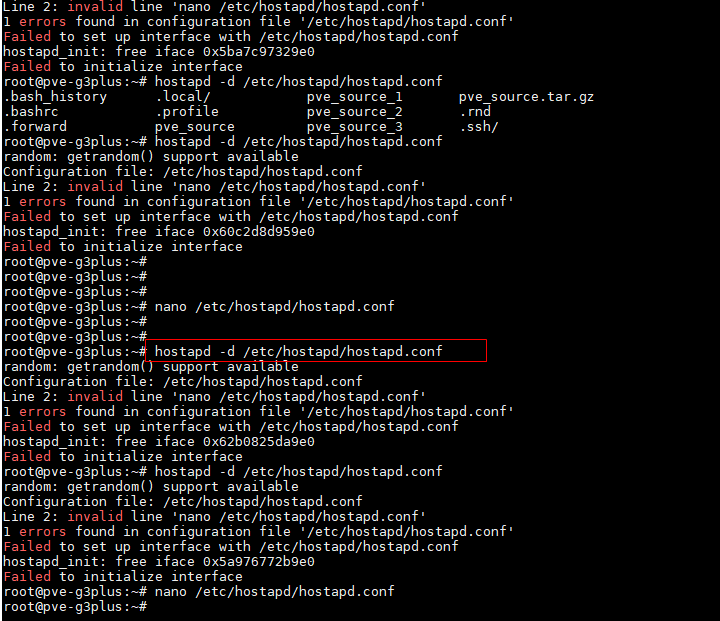
5、编辑hostapd服务的默认配置文件
nano /etc/default/hostapd
添加:
DAEMON_CONF=“/etc/hostapd/hostapd.conf”

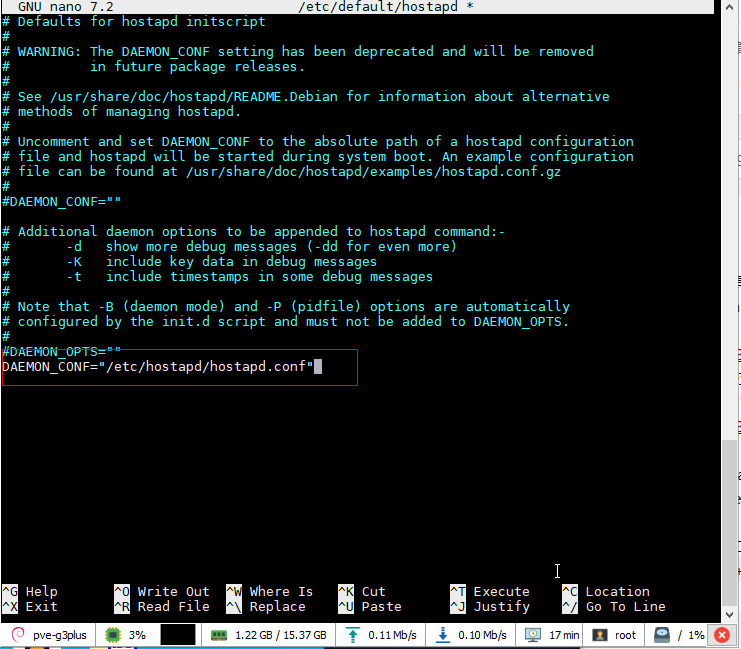
然后,CTRL+X ,Y+回车
6、iwlist wlp1s0 freq #查无线网卡支持的信道
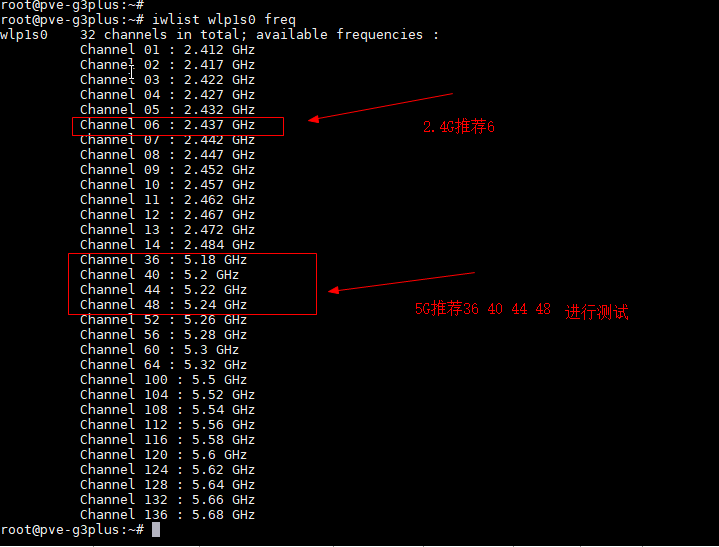
重点说下:2.4GHz干扰较少的是 6信道;5GHz非重叠信道有149、153、157、161和165五个信道,而这个无线网卡不支持,
可以自行尝试用5.2GHz频段的信道,如36、40、44、48等,下面的模板用36
7、编辑无线热点配置,需要修改interface=? ssid=? wpa_passphrase=?,这三项目就是无线网卡名字、无线信号、无线密码

2.4G设置
nano /etc/hostapd/hostapd.conf
This is a basic hostapd configuration for a 2.4GHz (802.11g) access point
Set the interface name
interface=网卡名称
#bridge=vmbr1 #根据实际网络,配置
Set the driver
driver=nl80211
Set the country code (adjust as necessary)
country_code=CN
Set the operating mode to 2.4GHz
hw_mode=g
Set the channel for 2.4GHz band (choose a specific channel or let hostapd choose)
channel=6
Set the SSID (network name)
ssid=无线信号
Set the network mode
ieee80211n=1
Set the network password
wpa=2
wpa_passphrase=无线密码
wpa_key_mgmt=WPA-PSK
wpa_pairwise=CCMP
rsn_pairwise=CCMP
Enable 802.11w management frame protection
ieee80211w=1
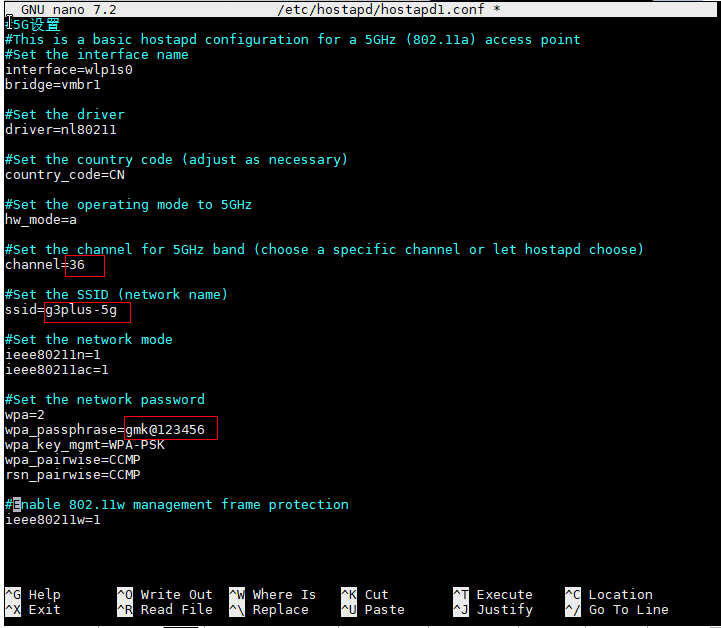
5G设置
nano /etc/hostapd/hostapd1.conf
This is a basic hostapd configuration for a 5GHz (802.11a) access point
Set the interface name
interface=网卡名称
#bridge=vmbr1 #根据实际网络,配置
Set the driver
driver=nl80211
Set the country code (adjust as necessary)
country_code=CN
Set the operating mode to 5GHz
hw_mode=a
Set the channel for 5GHz band (choose a specific channel or let hostapd choose)
channel=36
Set the SSID (network name)
ssid=无线信号-5g
Set the network mode
ieee80211n=1
ieee80211ac=1
Set the network password
wpa=2
wpa_passphrase=无线密码
wpa_key_mgmt=WPA-PSK
wpa_pairwise=CCMP
rsn_pairwise=CCMP
Enable 802.11w management frame protection
ieee80211w=1
8、解除pve对hostapd服务的禁用,及hostapd服务设置为开机启动。
systemctl unmask hostapd
systemctl enable hostapd

7、更新hostapd启动服务的配置
hostapd -d /etc/hostapd/hostapd.conf
可能会遇到不停滚代码的情况,按下ctrl+z,停止即可
8、重启下PVE。
输入:reboot
小结:
这里是PVE的vmbr1网桥,桥接无线网与软路由的LAN,实现无线,这样比直通做法要稳定很多
理论上2.4GHz和5GHz都支持,只是5Ghz可能存在干扰不兼容的异常,不是所有人都会遇到的,请自行尝试。
下图中channel=36、40、44、48,请自行尝试。