
通过公网IP的设备搭建FRP服务端,让其他设备(有无公网IP都可以)部署FRP客户端,映射出去,可以用这个公网+端口进行通讯。私有化的做法,还是有必要部署一个玩玩的。
我现在的主路由是ISTOREOS,我做法是主路由上直接安装FRP服务端,服务和端口映射全部在主路由上实现,当然也可以在群辉或者其他DOCKER下配置(就是后期玩的时候,需要路由器防火墙和群辉联合配置较为麻烦)
本门只提供配置截图和关键字眼,快速搭建FRP,你需要有一定理解能力和网络知识。
资源获取:https://github.com/fatedier/frp
一、FRP服务端,在ISTOREOS上配置如下:
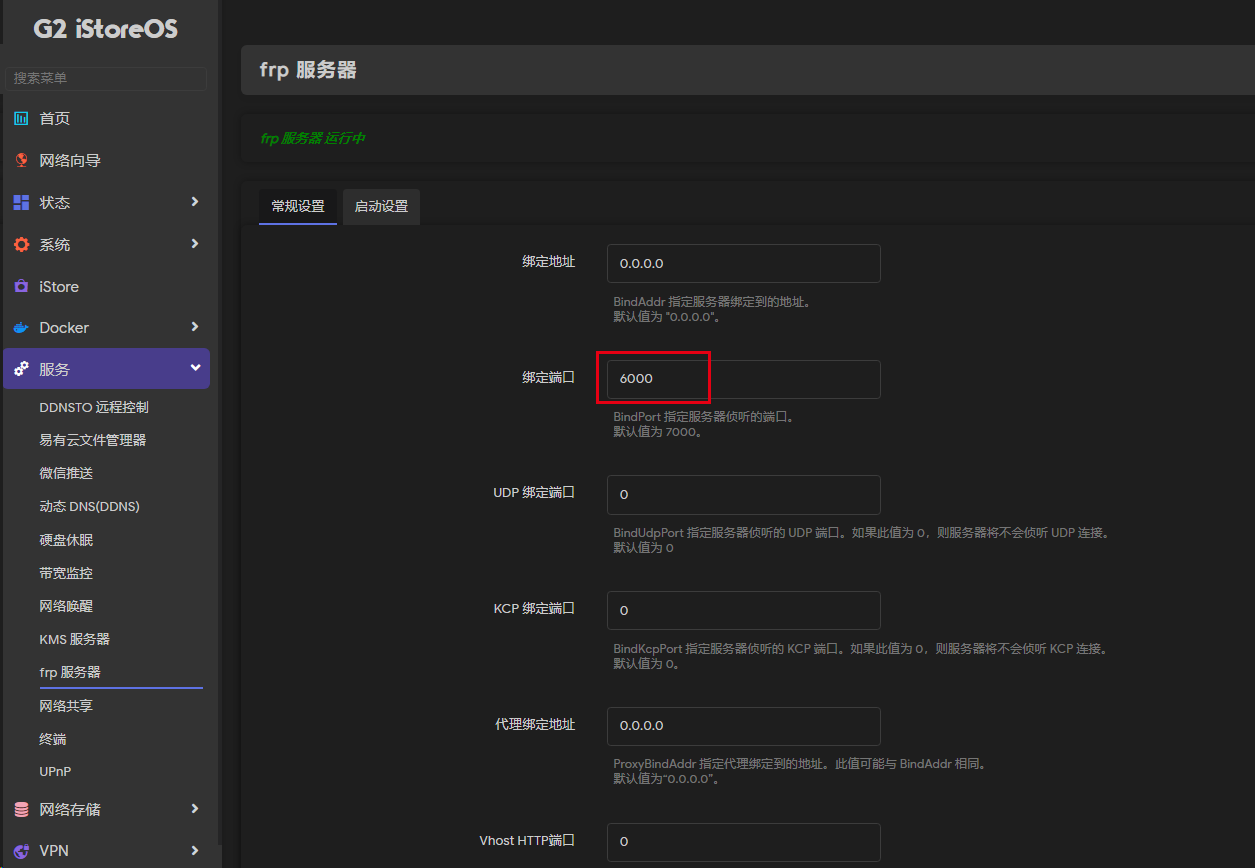
FRP接入接口默认7000,因为和我传奇私服冲突,改成了6000,后期6000~6999为FRP的转发端口
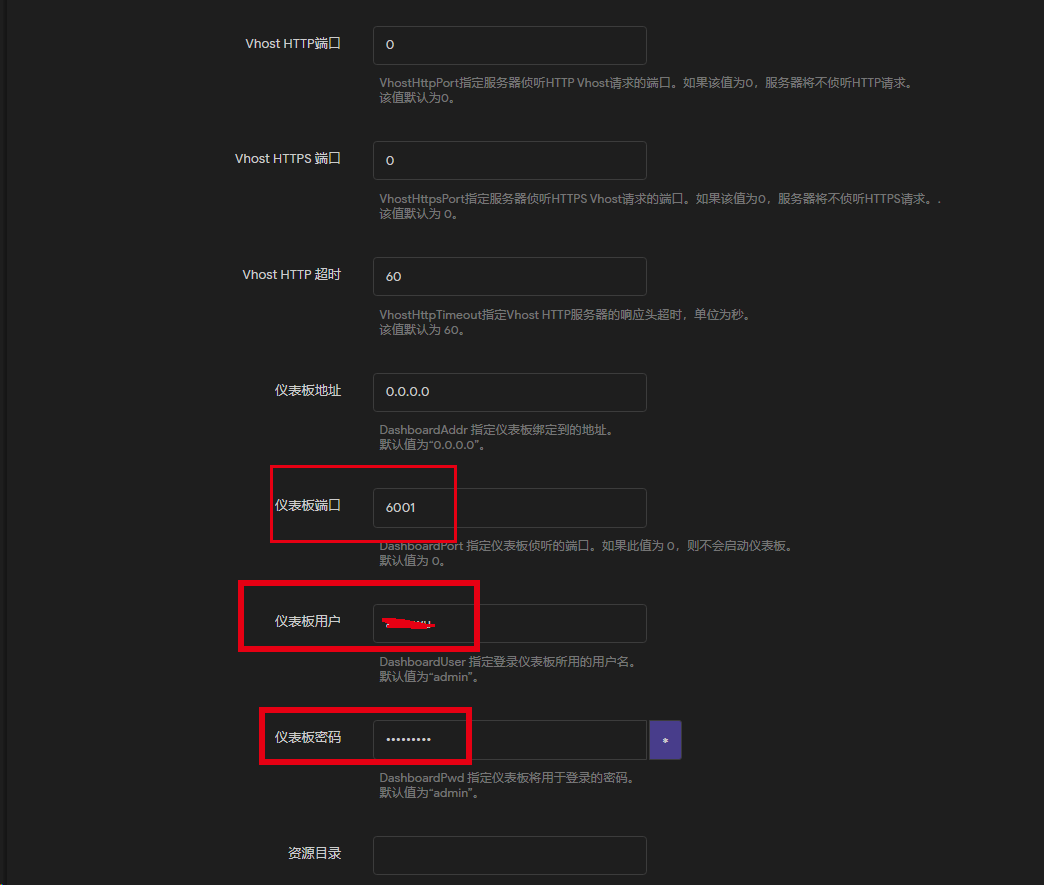
设置仪表盘端口6001,访问的账户密码
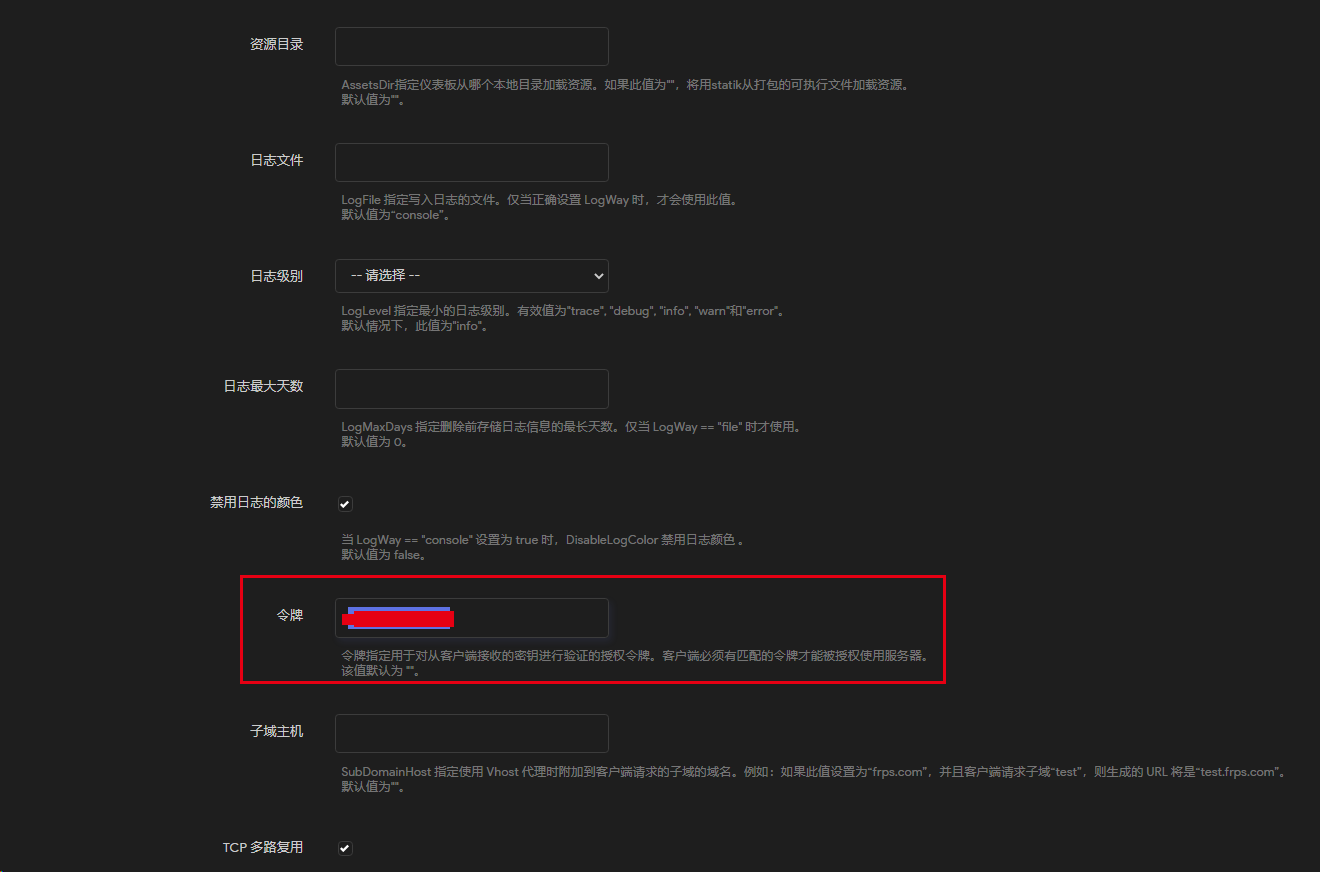
安全需要,设置接入的密码,设置token进行公钥认证。
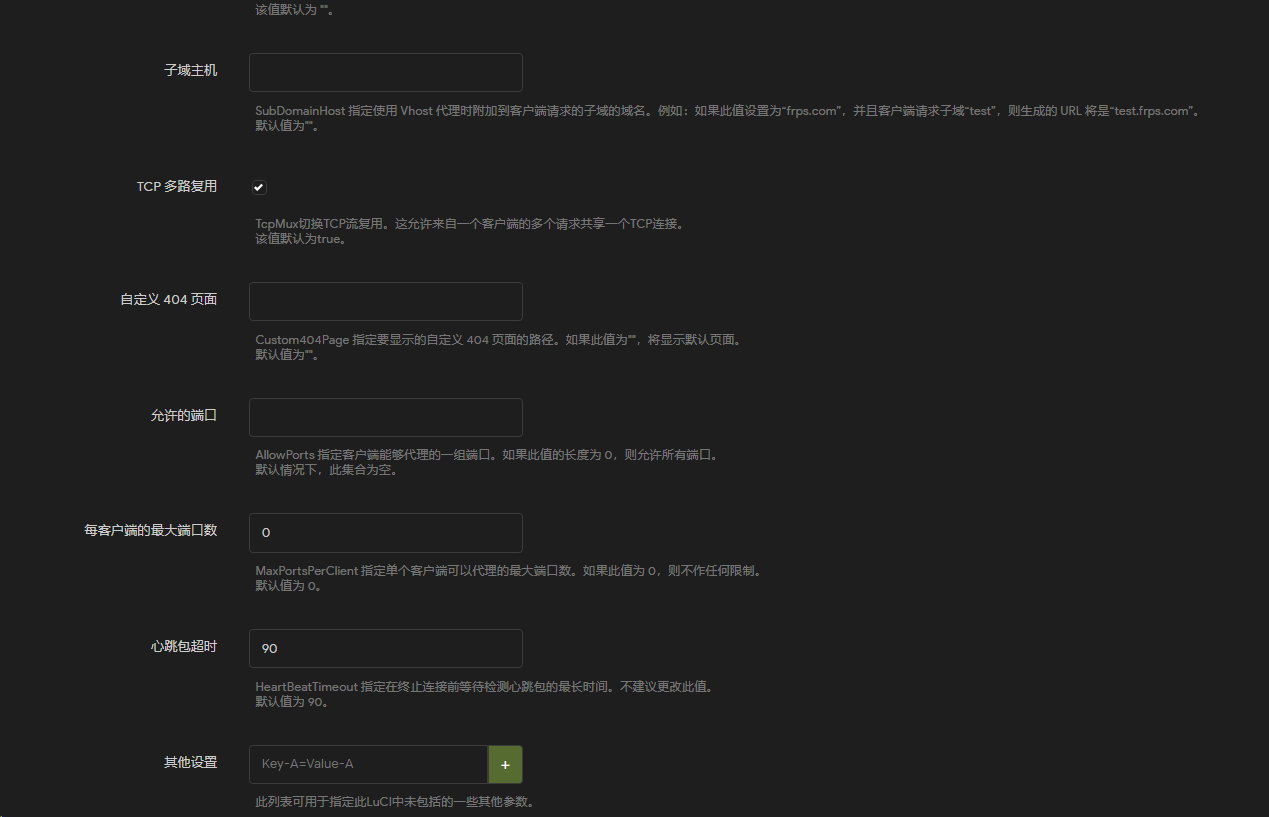
设置了超时90。
最后保存应用,记得需要防火墙开启对应端口映射。
二、FRP客户端配置字段:
以WINDOWS的MSTSC为例子
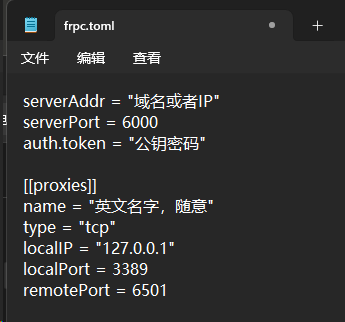
内容如下:
serverAddr = “域名或者IP”
serverPort = 6000
auth.token = “公钥密码”
[[proxies]]
name = “英文名字,随意”
type = “tcp”
localIP = “127.0.0.1”
localPort = 3389
remotePort = 6501
执行命令:
客户端所在目录下 ./frpc.exe -c ./frpc.toml

备注: 文中“”双引号是必须的,否则JSON报错:

frps.toml和frpc.toml中文注释说明
frps.toml的中文注释说明
必须包含 IPv6 的文字地址或主机名
在方括号中,如”[::1]:80″、”[ipv6-host]:http”或”[ipv6-host%zone]:80″
对于单个”bind_addr”字段,不需要方括号,如”bind_addr = ::”。
bindAddr = “0.0.0.0”
bindPort = 7000
用于 kcp 协议的 udp 端口,可以与 ‘bind_port’ 相同。
如果未设置,kcp 在 frps 中被禁用。
kcpBindPort = 7000
用于 quic 协议的 udp 端口。
如果没有设置,quic 在 frps 中被禁用。
quicBindPort = 7002
指定代理监听哪个地址,默认值与bind_addr相同
proxy_bind_addr = “127.0.0.1”
quic协议选项
transport.quic.keepalivePeriod = 10
transport.quic.maxIdleTimeout = 30
transport.quic.maxIncomingStreams = 100000
心跳配置,不建议修改默认值
heartbeat_timeout 默认值为 90。设置负值即可禁用。
transport.heartbeatTimeout = 90
每个代理中的池计数将不超过 maxPoolCount。
transport.maxPoolCount = 5
如果使用tcp流复用,默认为true
transport.tcpMux = true
指定 tcp mux 的保持活动间隔。
仅当 tcpMux 为 true 时才有效。
transport.tcpMuxKeepaliveInterval = 60
tcpKeepalive 指定 frpc 和 frps 之间活动网络连接的 keep-alive 探测之间的时间间隔。
如果为负,则禁用保持活动探测。
transport.tcpKeepalive = 7200
Transport.tls.force 指定是否只接受 TLS 加密的连接。 默认情况下,该值为 false。
tls.force = false
transport.tls.certFile = “server.crt”
transport.tls.keyFile = “server.key”
transport.tls.trustedCaFile = “ca.crt”
如果要支持虚拟主机,必须设置监听的http端口(可选)
注意:http端口和https端口可以与bind_port相同
vhostHTTPPort = 80
vhostHTTPSPort = 443
vhost http服务器的响应头超时(秒),默认为60秒
vhostHTTPTimeout = 60
tcpmuxHTTPConnectPort 指定服务器监听 TCP 的端口
HTTP CONNECT 请求。 如果值为0,服务器不会复用TCP
单个端口上的请求。 如果不是 – 它将监听这个值
HTTP CONNECT 请求。 默认情况下,该值为 0。
tcpmuxHTTPConnectPort = 1337
如果 tcpmux_passthrough 为 true,frps 不会对流量进行任何更新。
tcpmuxPassthrough = false
配置Web服务器以启用frps的仪表板。
仅当设置了 webServer.port 时,仪表板才可用。
webServer.addr = “127.0.0.1”
webServer.port = 7500
webServer.user = “admin”
webServer.password = “admin”
webServer.tls.certFile = “server.crt”
webServer.tls.keyFile = “server.key”
dashboard assets directory(only for debug mode)
webServer.assetsDir = “./static”
在仪表板监听器中启用 golang pprof 处理程序。
必须首先设置仪表板端口
webServer.pprofEnable = false
#enablePrometheus 将在 /metrics api 中导出 webServer 上的 prometheus 指标。
enablePrometheus = true
控制台或真实日志文件路径,如 ./frps.log
log.to = “./frps.log”
trace, debug, info, warn, error
log.level = “info”
log.maxDays = 3
当 log.to 为控制台时禁用日志颜色,默认为 false
log.disablePrintColor = false
#DetailedErrorsToClient 定义是否将特定错误(带有调试信息)发送到 frpc。 默认情况下,该值为 true。
detailedErrorsToClient = true
auth.method 指定使用什么身份验证方法对 frpc 和 frps 进行身份验证。
如果指定了”token” – 令牌将被读入登录消息。
如果指定”oidc” – 将使用 OIDC 设置颁发 OIDC(开放 ID 连接)令牌。 默认情况下,该值为”token”。
auth.method = “token”
auth.additionalScopes 指定包含身份验证信息的附加范围。
可选值为 HeartBeats、NewWorkConns。
auth.additionalScopes = [“HeartBeats”, “NewWorkConns”]
auth token
auth.token =”123456″
oidc 发行者指定验证 OIDC 令牌的发行者。
auth.oidc.issuer = “”
oidcaudience 指定验证时 OIDC 令牌应包含的受众。
auth.oidc.audience = “”
oidc SkipExpiryCheck 指定是否在 OIDC 令牌过期时跳过检查。
auth.oidc.skipExpiryCheck = false
oidc skipIssuerCheck 指定是否跳过检查 OIDC 令牌的颁发者声明是否与 OidcIssuer 中指定的颁发者匹配。
auth.oidc.skipIssuerCheck = false
userConnTimeout 指定等待工作连接的最长时间。
userConnTimeout = 10
只允许 frpc 绑定您列出的端口。 默认情况下,不会有任何限制。
allowPorts = [
{ start = 2000, end = 3000 },
{ single = 3001 },
{ single = 3003 },
]
每个客户端可以使用的最大端口数,默认值为0表示无限制
maxPortsPerClient = 0
如果subDomainHost不为空,则可以在frpc的配置文件中设置type为http或https时的子域名
subDomainHost = “frps.com”
subdomain为test时,路由使用的host为test.frps.com
subDomainHost = “*.proxy.frps.com”
subdomain为test时,路由使用的host为test.proxy.frps.com
HTTP 请求的自定义 404 页面
custom404Page = “/path/to/404.html”
指定udp数据包大小,单位为字节。 如果未设置,则默认值为 1500。
这个参数在客户端和服务器之间应该是相同的。
它影响 udp 和 sudp 代理。
udpPacketSize = 1500
NAT打洞策略数据的保留时间。
natholeAnalysisDataReserveHours = 168
[[http插件]]
name = “user-manager”
addr = “127.0.0.1:9000”
path = “/handler”
ops = [“Login”]
[[http插件]]
name = “port-manager”
addr = “127.0.0.1:9001”
path = “/handler”
ops = [“NewProxy”]
配置使用之前记得验证一下,是否正常
./frps verify -c frps.toml
frpc.toml的中文注释说明
您的代理名称将更改为 {user}.
user = “your_name”
必须包含 IPv6 的文字地址或主机名
在方括号中,如”[::1]:80″、”[ipv6-host]:http”或”[ipv6-host%zone]:80″
对于单个 serverAddr 字段,不需要方括号,如 serverAddr = “::”。
serverAddr = “0.0.0.0”
serverPort = 7000
STUN 服务器帮助穿透 NAT 漏洞。
natHoleStunServer = “stun.easyvoip.com:3478”
决定首次登录失败是否退出程序,否则不断重新登录frps
默认为真
loginFailExit = true
控制台或真实日志文件路径,如 ./frpc.log
log.to = “./frpc.log”
trace, debug, info, warn, error
log.level = “info”
log.maxDays = 3
当 log.to 为控制台时禁用日志颜色,默认为 false
log.disablePrintColor = false
auth.method = “token”
auth.additionalScopes 指定包含身份验证信息的附加范围。
可选值为 HeartBeats、NewWorkConns。
auth.additionalScopes = [“HeartBeats”, “NewWorkConns”]
授权令牌
auth.token = “12345678”
oidc.clientID 指定用于在 OIDC 身份验证中获取令牌的客户端 ID。
auth.oidc.clientID = “”
oidc.clientSecret 指定用于在 OIDC 身份验证中获取令牌的客户端密钥。
auth.oidc.clientSecret = “”
oidc.audience 指定 OIDC 认证中令牌的受众。
auth.oidc.audience = “”
oidc_scope 指定 OIDC 身份验证中令牌的权限,如果 AuthenticationMethod == “oidc”。 默认情况下,该值为””。
auth.oidc.scope = “”
oidc.tokenEndpointURL 指定实现 OIDC 令牌端点的 URL。
它将用于获取 OIDC 令牌。
auth.oidc.tokenEndpointURL = “”
oidc.additionalEndpointParams 指定要发送到 OIDC 令牌端点的附加参数。
例如,如果要指定”audience”参数,可以如下设置。
frp 会将”audience=”、”var1=”添加到附加参数中。
auth.oidc.additionalEndpointParams.audience = “https://dev.auth.com/api/v2/”
auth.oidc.additionalEndpointParams.var1 = “foobar”
设置管理地址,用于通过http api控制frpc的动作,如reload
webServer.addr = “127.0.0.1”
webServer.port = 7400
webServer.user = “admin”
webServer.password = “admin”
管理资产目录。 默认情况下,这些资源与 frpc 捆绑在一起。
webServer.assetsDir = “./static”
在管理监听器中启用 golang pprof 处理程序。
webServer.pprofEnable = false
拨号到服务器等待连接完成的最长时间。 默认值为 10 秒。
transport.dialServerTimeout = 10
dialServerKeepalive 指定 frpc 和 frps 之间活动网络连接的 keep-alive 探测之间的时间间隔。
如果为负,则禁用保持活动探测。
transport.dialServerKeepalive = 7200
连接将提前建立,默认值为零
transport.poolCount = 5
如果使用tcp流复用,默认为true,必须与frps相同
transport.tcpMux = true
指定 tcp mux 的保持活动间隔。
仅当 tcpMux 启用时才有效。
transport.tcpMuxKeepaliveInterval = 60
用于连接服务器的通信协议
现在支持 tcp、kcp、quic、websocket 和 wss,默认为 tcp
transport.protocol = “tcp”
设置客户端连接服务器时绑定的ip,默认为空。
仅当protocol = tcp或websocket时,才会使用该值。
transport.connectServerLocalIP = “0.0.0.0”
如果你想通过http代理或者socks5代理或者ntlm代理连接frps,可以在这里或者全局环境变量中设置proxyURL
仅当协议为 tcp 时才有效
transport.proxyURL = “http://user:passwd@192.168.1.128:8080”
transport.proxyURL = “socks5://user:passwd@192.168.1.128:1080”
transport.proxyURL = “ntlm://user:passwd@192.168.1.128:2080”
quic协议选项
transport.quic.keepalivePeriod = 10
transport.quic.maxIdleTimeout = 30
transport.quic.maxIncomingStreams = 100000
如果tls.enable为true,frpc将通过tls连接frps。
从v0.50.0开始,默认值改为true,并且默认启用tls。
transport.tls.enable = true
transport.tls.certFile = “client.crt”
transport.tls.keyFile = “client.key”
transport.tls.trustedCaFile = “ca.crt”
transport.tls.serverName = “example.com”
如果disableCustomTLSFirstByte设置为false,frpc将使用以下方式与frps建立连接
启用 tls 时的第一个自定义字节。
从v0.50.0开始,默认值改为true,并且默认禁用第一个自定义字节。
transport.tls.disableCustomTLSFirstByte = true
心跳配置,不建议修改默认值。
heartbeat_interval默认值为10,heartbeat_timeout默认为90。设置负值禁用它。
transport.heartbeatInterval = 30
transport.heartbeatTimeout = 90
指定一个dns服务器,这样frpc将使用它而不是默认的
dnsServer = “8.8.8.8”
您要启动的代理名称。
默认为空,表示所有代理。
start = [“ssh”, “dns”]
指定udp数据包大小,单位为字节。 如果未设置,则默认值为 1500。
这个参数在客户端和服务器之间应该是相同的。
它影响 udp 和 sudp 代理。
udpPacketSize = 1500
客户端的附加元数据。
metadatas.var1 = “abc”
metadatas.var2 = “123”
包含代理的其他配置文件。
includes = [“./confd/*.ini”]
[[proxies]]
‘ssh’ 是唯一的代理名称
如果全局用户不为空,则改为{user}.{proxy} 如’your_name.ssh’
name = “ssh”
type = “tcp”
localIP = “127.0.0.1”
localPort = 22
限制该代理的带宽,单位是KB和MB
transport.bandwidthLimit = “1MB”
限制带宽的地方,可以是’client’或’server’,默认是’client’
transport.bandwidthLimitMode = “client”
如果为 true,则该代理的流量将被加密,默认为 false
transport.useEncryption = false
如果为 true,流量将被压缩
transport.useCompression = false
通过frps监听远程端口
remotePort = 6001
frps 将为同一组中的代理负载平衡连接
loadBalancer.group = “test_group”
组应该有相同的组密钥
loadBalancer.groupKey = “123456”
为后端服务启用健康检查,现在支持’tcp’和’http’。
frpc 将连接本地服务的端口来检测其健康状态
healthCheck.type = “tcp”
健康检查连接超时
healthCheck.timeoutSeconds = 3
如果连续3次失败,代理将从frps中移除
healthCheck.maxFailed = 3
每10秒会进行一次健康检查
healthCheck.intervalSeconds = 10
每个代理的附加元信息
metadatas.var1 = “abc”
metadatas.var2 = “123”
[[proxies]]
name = “ssh_random”
type = “tcp”
localIP = “192.168.31.100”
localPort = 22
如果remote_port为0,frps会为你分配一个随机端口
remotePort = 0
[[proxies]]
name = “dns”
type = “udp”
localIP = “114.114.114.114”
localPort = 53
remotePort = 6002
将您的域名解析为 [server_addr],以便您可以使用 http://web01.yourdomain.com 浏览 web01,使用 http://web02.yourdomain.com 浏览 web02
[[proxies]]
name = “web01”
type = “http”
localIP = “127.0.0.1”
localPort = 80
http用户名和密码是http协议的安全认证
如果不设置,无需认证即可访问此custom_domains
httpUser = “admin”
httpPassword = “admin”
如果frps的域名是frps.com,那么您可以通过URL http://web01.frps.com访问[web01]代理
subdomain = “web01”
customDomains = [“web01.yourdomain.com”]
位置仅适用于 http 类型
locations = [“/”, “/pic”]
如果 http 基本自动用户是 abc,则将请求路由到此服务
route_by_http_user = abc
hostHeaderRewrite = “example.com”
带有前缀”header_”的参数将用于更新http请求头
requestHeaders.set.x-from-where = “frp”
healthCheck.type = “http”
frpc 将向本地 http 服务发送 GET http 请求 ‘/status’
当 http 服务返回 2xx http 响应代码时,它就处于活动状态
healthCheck.path = “/status”
healthCheck.intervalSeconds = 10
healthCheck.maxFailed = 3
healthCheck.timeoutSeconds = 3
[[proxies]]
name = “web02”
type = “https”
localIP = “127.0.0.1”
localPort = 8000
subdomain = “web02”
customDomains = [“web02.yourdomain.com”]
如果不为空,frpc将使用代理协议将连接信息传输到您的本地服务
v1 或 v2 或空
transport.proxyProtocolVersion = “v2”
[[proxies]]
name = “tcpmuxhttpconnect”
type = “tcpmux”
multiplexer = “httpconnect”
localIP = “127.0.0.1”
localPort = 10701
customDomains = [“tunnel1”]
routeByHTTPUser = “user1”
[[proxies]]
name = “plugin_unix_domain_socket”
type = “tcp”
remotePort = 6003
如果定义了plugin,local_ip和local_port就没用了
插件将处理从 frps 获得的连接
[proxies.plugin]
type = “unix_domain_socket”
unixPath = “/var/run/docker.sock”
[[proxies]]
name = “plugin_http_proxy”
type = “tcp”
remotePort = 6004
[proxies.plugin]
type = “http_proxy”
httpUser = “abc”
httpPassword = “abc”
[[proxies]]
name = “plugin_socks5”
type = “tcp”
remotePort = 6005
[proxies.plugin]
type = “socks5”
username = “abc”
password = “abc”
[[proxies]]
name = “plugin_static_file”
type = “tcp”
remotePort = 6006
[proxies.plugin]
type = “static_file”
localPath = “/var/www/blog”
stripPrefix = “static”
httpUser = “abc”
httpPassword = “abc”
[[proxies]]
name = “plugin_https2http”
type = “https”
customDomains = [“test.yourdomain.com”]
[proxies.plugin]
type = “https2http”
localAddr = “127.0.0.1:80”
crtPath = “./server.crt”
keyPath = “./server.key”
hostHeaderRewrite = “127.0.0.1”
requestHeaders.set.x-from-where = “frp”
[[proxies]]
name = “plugin_https2https”
type = “https”
customDomains = [“test.yourdomain.com”]
[proxies.plugin]
type = “https2https”
localAddr = “127.0.0.1:443”
crtPath = “./server.crt”
keyPath = “./server.key”
hostHeaderRewrite = “127.0.0.1”
requestHeaders.set.x-from-where = “frp”
[[proxies]]
name = “plugin_http2https”
type = “http”
customDomains = [“test.yourdomain.com”]
[proxies.plugin]
type = “http2https”
localAddr = “127.0.0.1:443”
hostHeaderRewrite = “127.0.0.1”
requestHeaders.set.x-from-where = “frp”
[[proxies]]
name = “secret_tcp”
如果类型是secret tcp,则remote_port没有用
如果想要连接本地端口,需要部署另一个带有stcp代理的frpc,角色是visitor
type = “stcp”
secretKey is used for authentication for visitors
secretKey = “abcdefg”
localIP = “127.0.0.1”
localPort = 22
如果不为空,则只有指定用户的访问者可以连接。
否则,来自同一用户的访问者可以连接。 ‘*’ 表示允许所有用户。
allowUsers = [“*”]
[[proxies]]
name = “p2p_tcp”
type = “xtcp”
secretKey = “abcdefg”
localIP = “127.0.0.1”
localPort = 22
如果不为空,则只有指定用户的访问者可以连接。
否则,来自同一用户的访问者可以连接。 ‘*’ 表示允许所有用户。
allowUsers = [“user1”, “user2”]
frpc 角色访问者 -> frps -> frpc 角色服务器
[[visitors]]
name = “secret_tcp_visitor”
type = “stcp”
您要访问的服务器名称
serverName = “secret_tcp”
secretKey = “abcdefg”
#将此地址连接到访客stcp服务器
bindAddr = “127.0.0.1”
#bindPort可以小于0,表示不绑定端口,只接收重定向的连接
其他访客。 (目前SUDP不支持)
bindPort = 9000
[[visitors]]
name = “p2p_tcp_visitor”
type = “xtcp”
如果不设置服务器用户,则默认为当前用户
serverUser = “user1”
serverName = “p2p_tcp”
secretKey = “abcdefg”
bindAddr = “127.0.0.1”
#bindPort可以小于0,表示不绑定端口,只接收重定向的连接其他访客。 (目前SUDP不支持)
bindPort = 9001
当需要自动隧道持久化时,设置为true
keepTunnelOpen = false
keep_tunnel_open设置为true时有效,每小时尝试打通的次数
maxRetriesAnHour = 8
minRetryInterval = 90